Red Curry with Chicken and Bamboo Shoots (Serves 3-4 people + leftovers)
Tips and notes before starting:
- I tried drying, dehydrating, freezing the Thai Basil so that I could possibly send them for you to use, but it did not work. The true flavor of the oils and essence of the herbs are lost if they are not used fresh however I did provide Kaffir Leaves which should be good to use. When picking out Thai Basil, make sure the stems are purple, these are the most aromatic. If you cannot get any fresh herbs don’t fret, your curry will survive without them, however they are useful to achieve that next level flavor, and I am happy to send suggestions on where you might find them.
- Bamboo might be new to you in this dish or overall. We use the tips because they are not fibrous like the shoots, however some places may prefer that. You can substitute other vegetables you might find in typical restaurants, i.e. cauliflower, bell pepper, carrot, onion. If you substitute, be careful of the cooking time, since overcooking these will make the texture softer. Put them in last.
- Since you are not using all the Curry paste, you can save it in a bag for next time or another Thai curry dish.
Dish Type:
Curry + Rice (You can probably find how to cook rice on youtube)
Curry + Noodles (Japanese Soba or Round Rice Noodles can be used)
Ingredient List:
Red Curry Paste (~60 grams) [Maesri Brand]
Coconut Cream (~400 mL) [Savoy Brand]
Bamboo Shoot Tip (~1 can) [Dragonfly Brand]
Chicken Thigh (~1.5 lbs) [can substitute Breast and or Organic]
Kaffir Leaf (~10-12)
Thai Basil (~1 Bunch)
Fresh Thai Chili Pepper (What you can handle)
Fish Sauce (to taste)
Salt
Water
Prep Work + Mis en Place: [15-20 min]
Open your canned ingredients, wash all your herbs and veggies. Prepare your layout and station so you can access your ingredients easily.
Meat: Rinse chicken, then cut into 1/2” x 1” strips, season with a pinch of salt and set aside.
Pro Tip: Save any fat or skin from your protein to render and collect that oil. You can even get fancy and use crispy chicken skin bits to top off your dish!
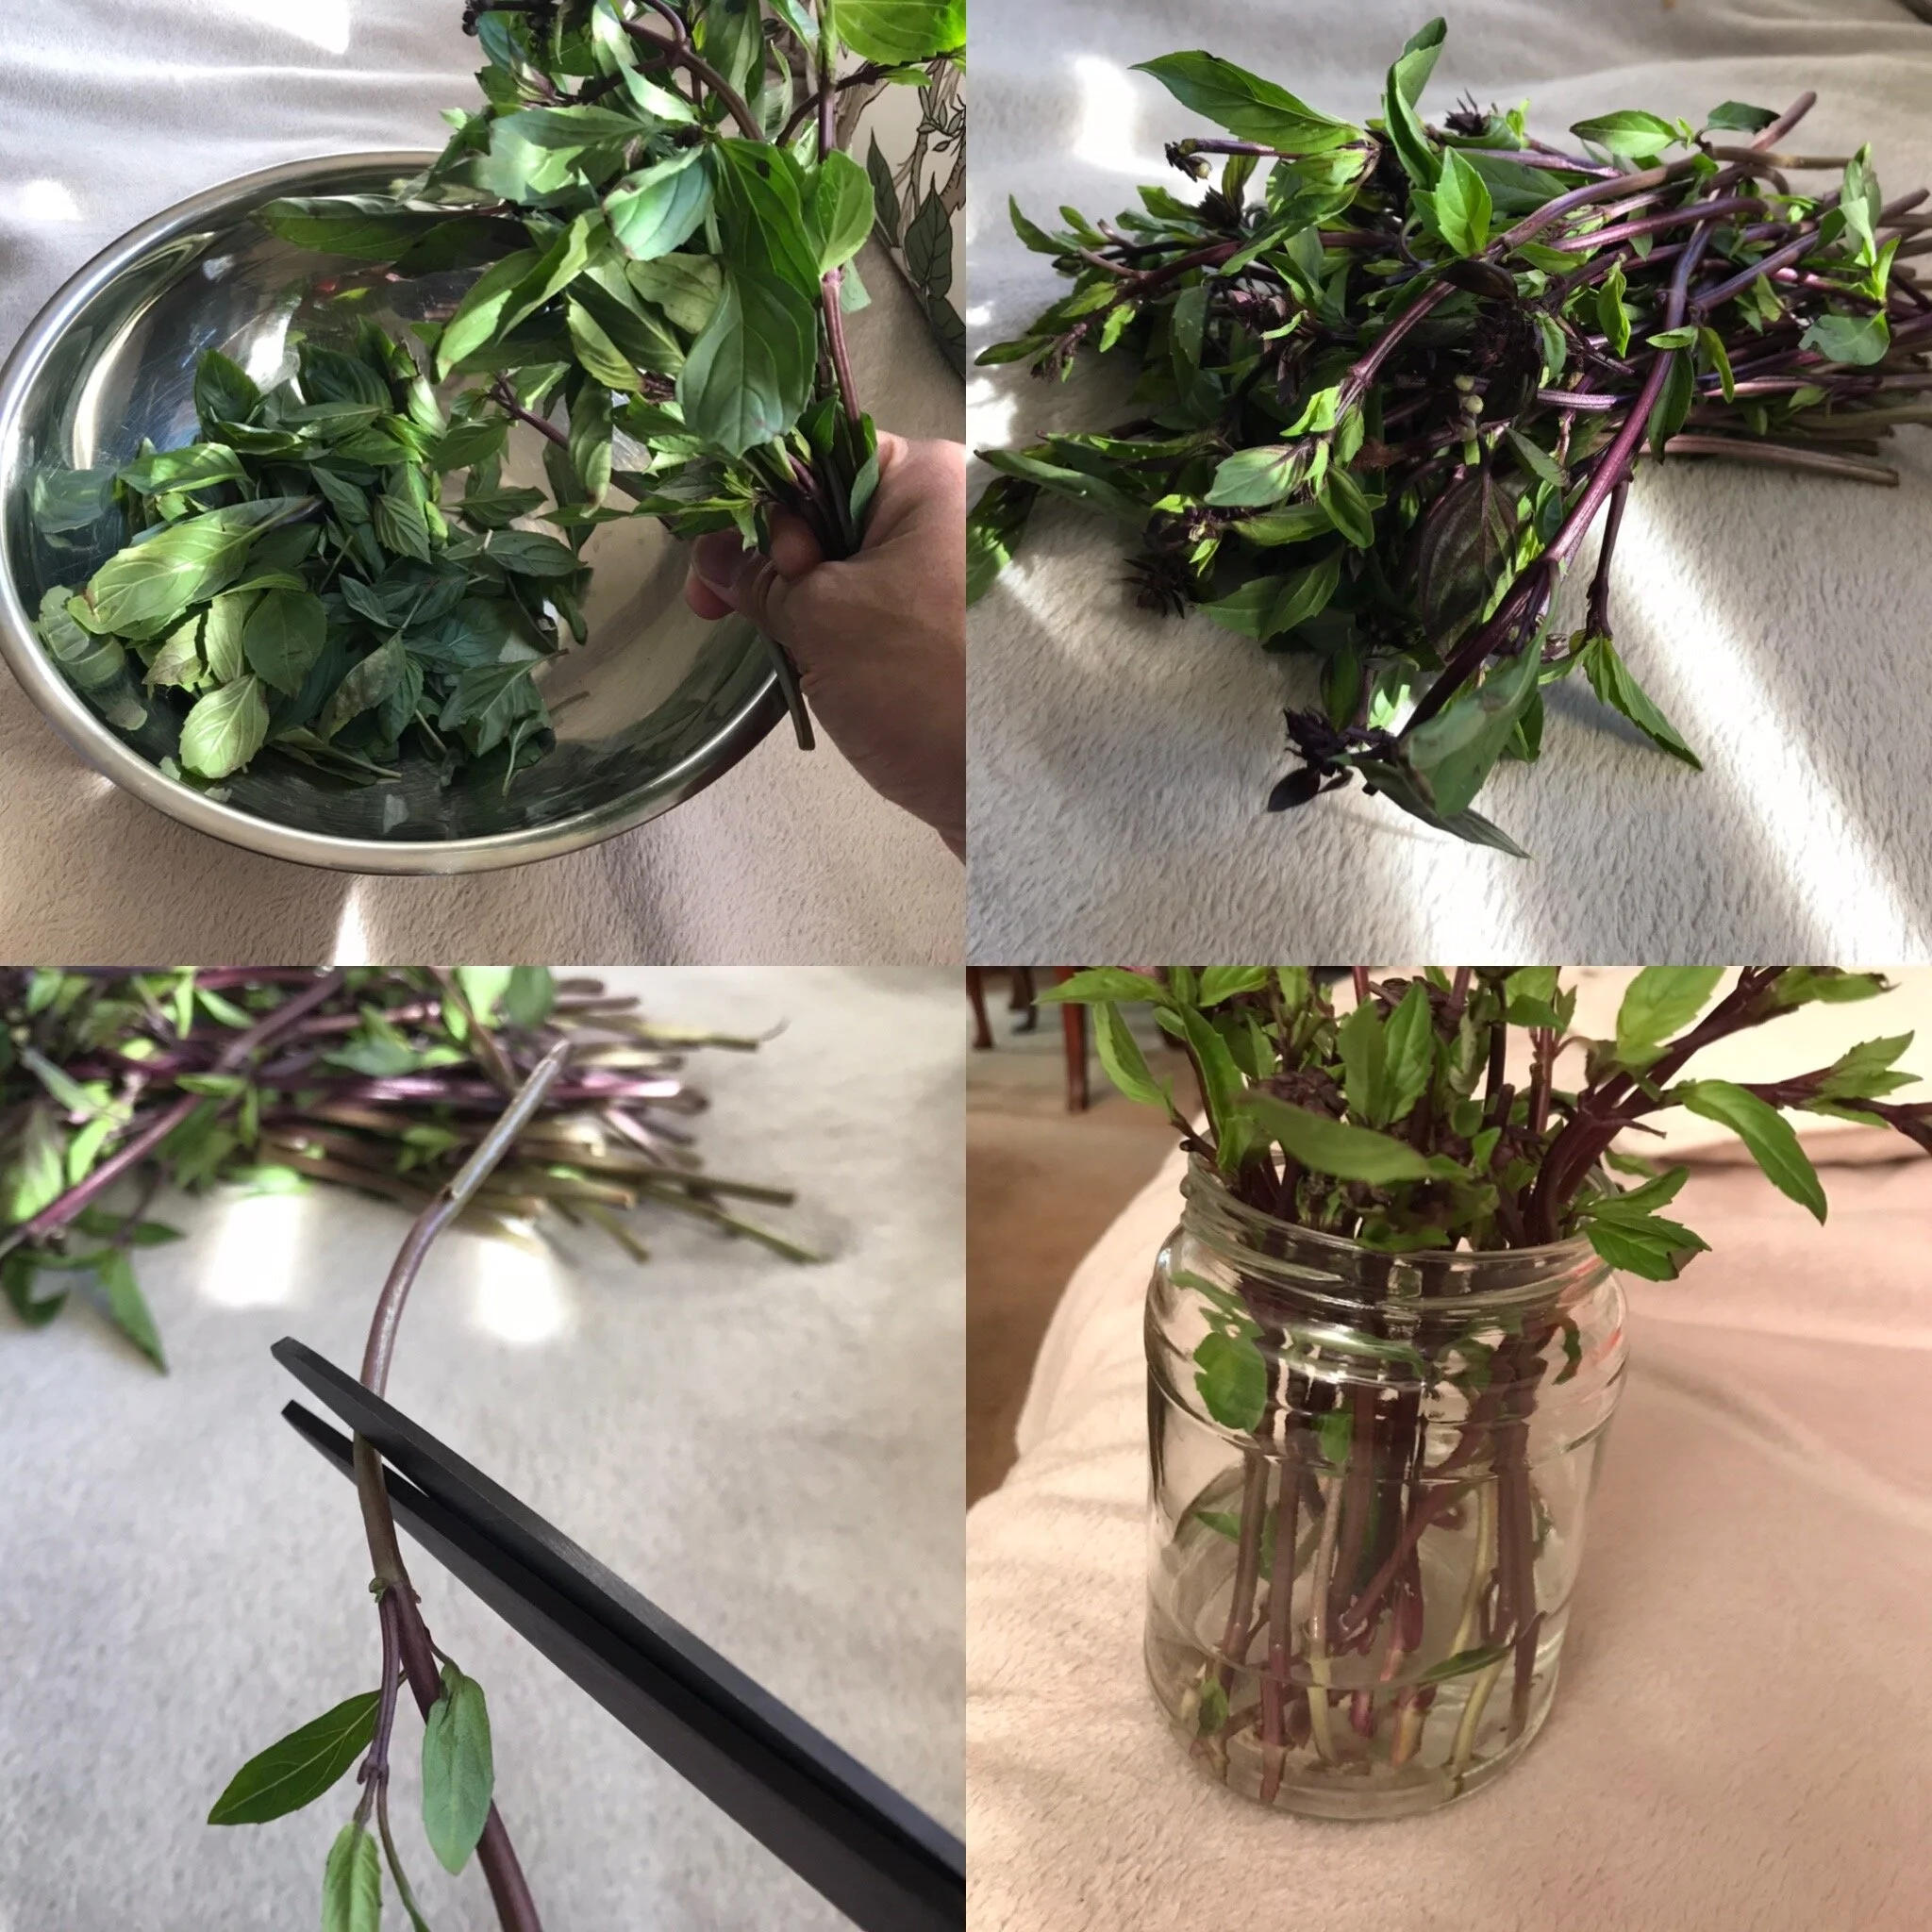
Basil: Tear the large leaves from the stem, set aside for later.
Pro Tip: You can save the stems, regrow the roots, plant in soil and basil will grow again. Make sure the make a diagonal cut below where the stems branch out, then soak in water (Picture Below)
Kaffir Leafs: The Leaves come in pairs, separate each leaf. You can also use a knife or hands to remove the midrib (center stem) to make halves, set aside.
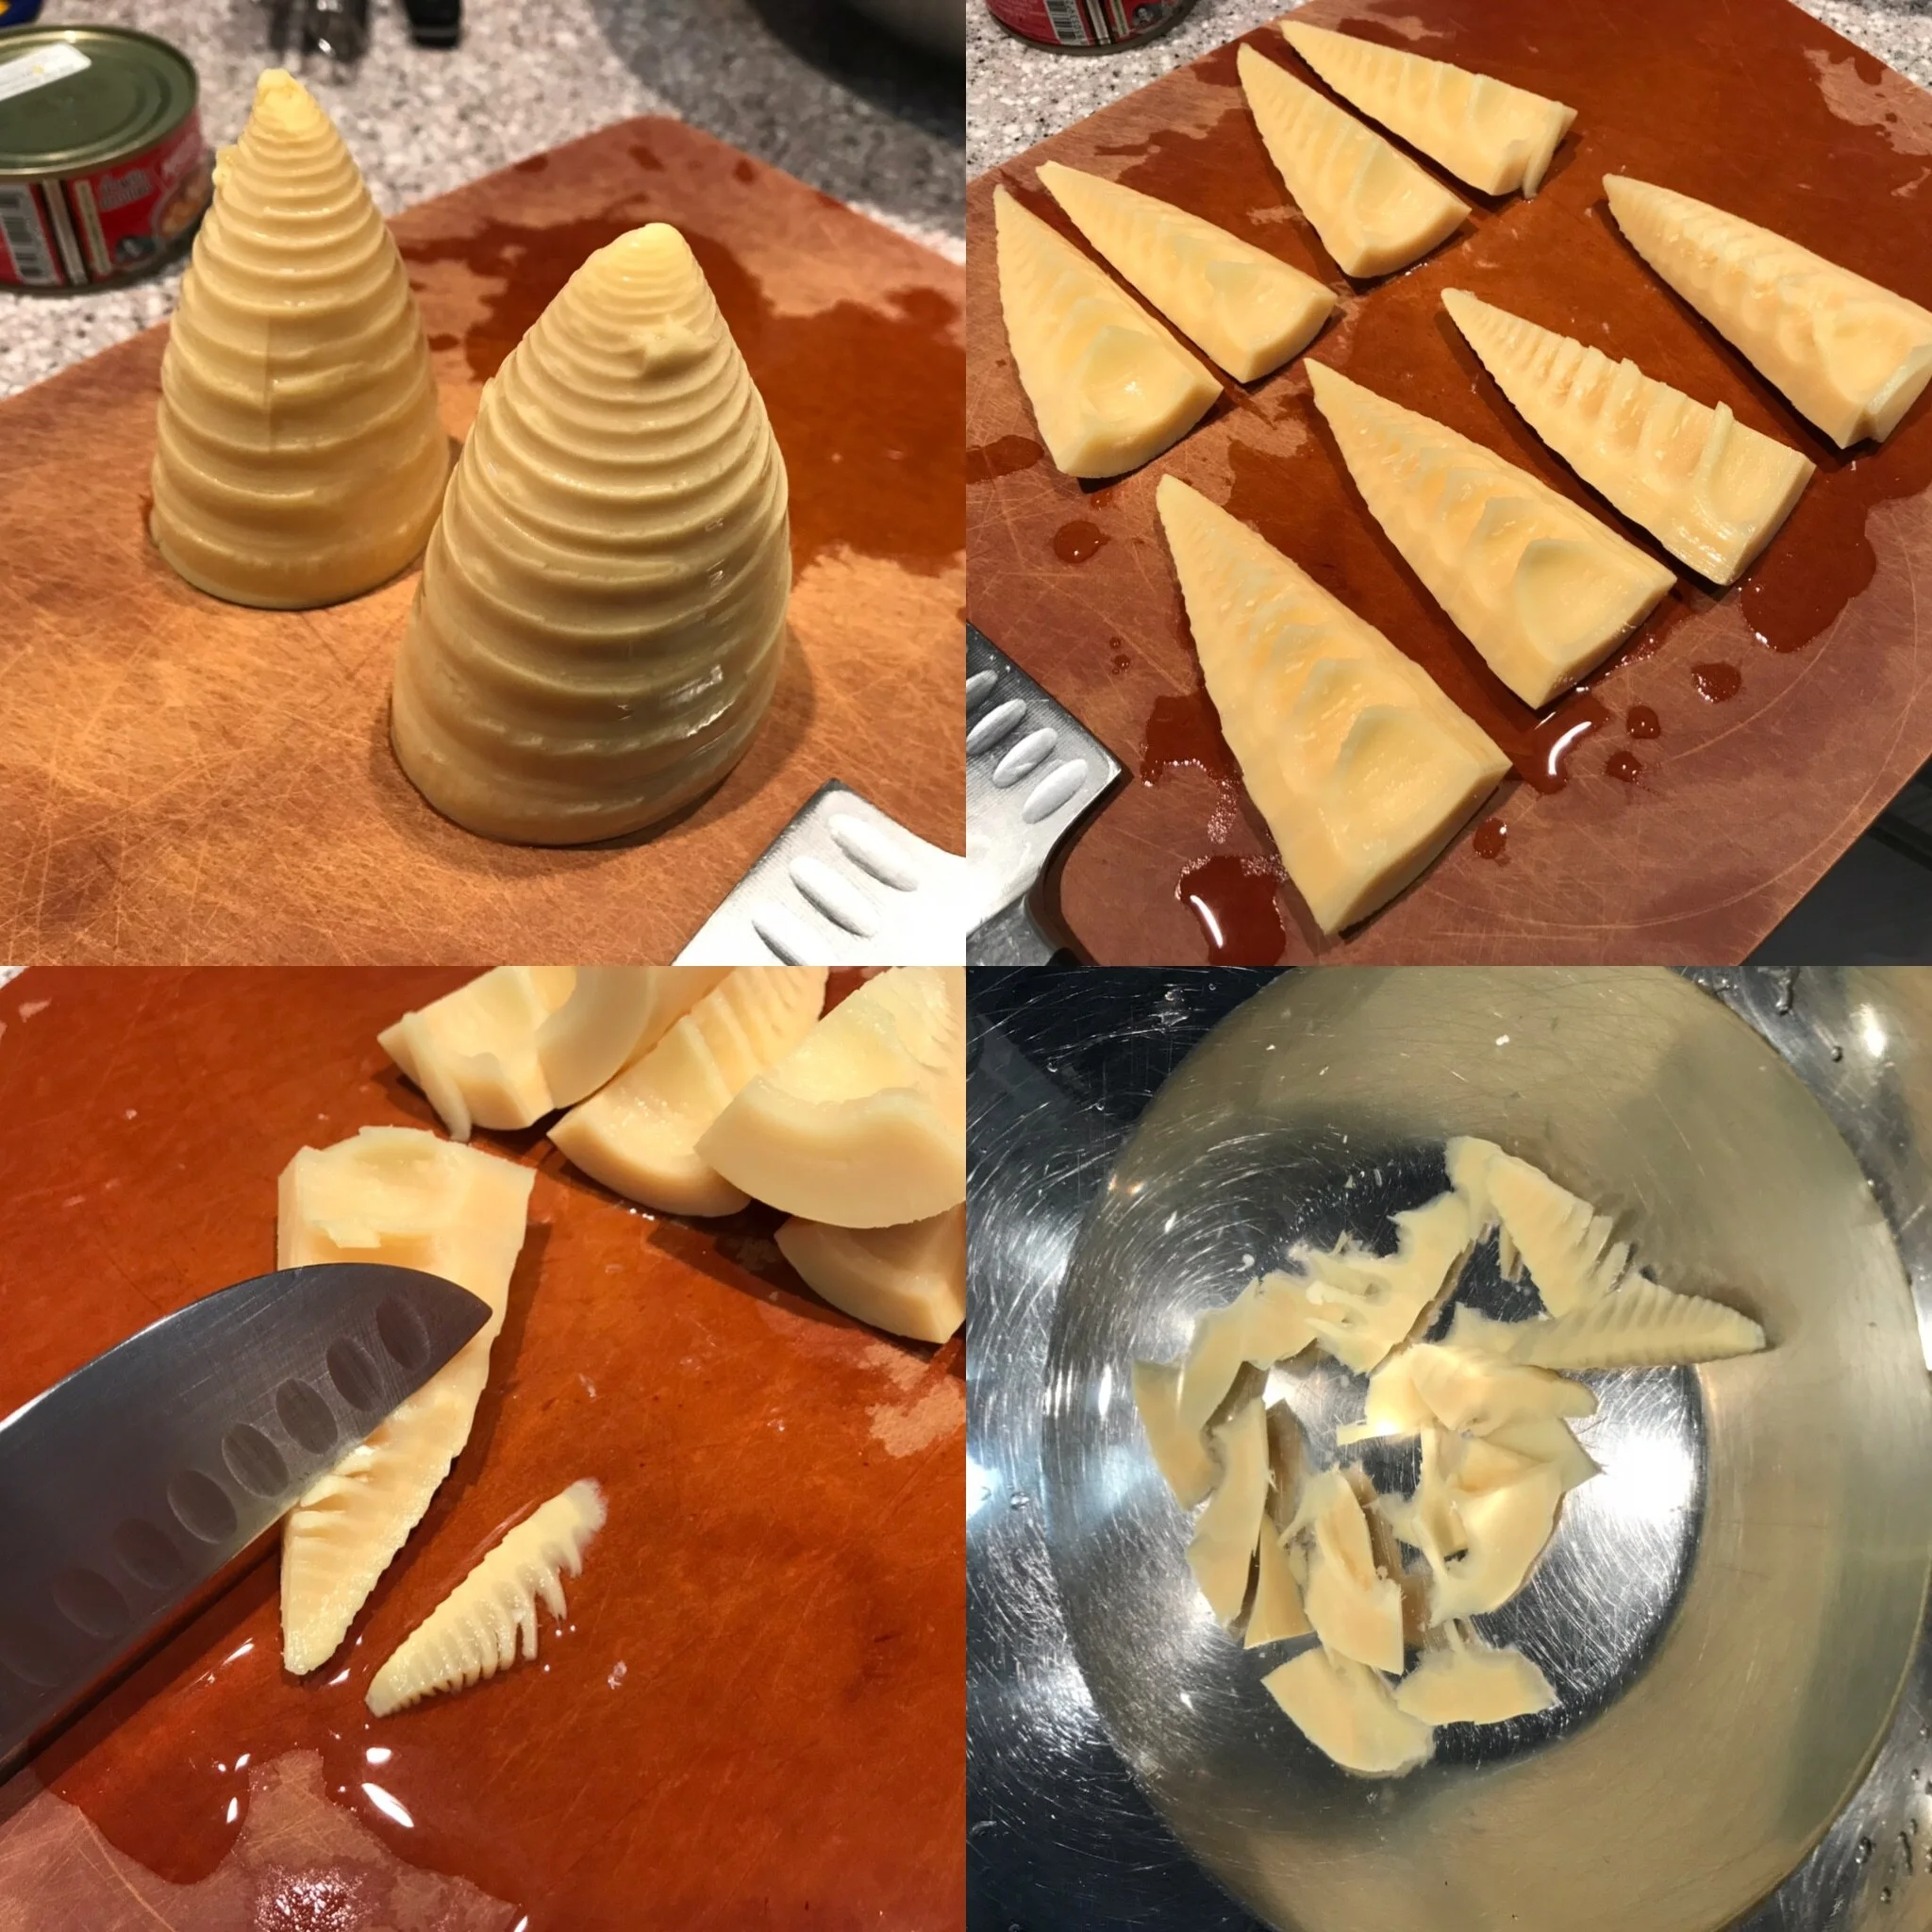
Bamboo: Each tip has a conical shape, cut the Bamboo tips into 4 equal sections from slicing from tip to base. For each section, aim for diagonal cuts keeping each slice no longer than 1.5” and no wider than 1/4 inches. (Photo of slices Below) Soak in salt water until use.
Work Instructions:

Step 0: Render fat [15-20 min]
If you saved fat and skin from your protein, render away to use for cooking the curry paste. Don’t worry about too much oil in the dish, it can be removed later. Worry about Flavor :)
If you do not have meat to render fat, or short on time, cooking oil will suffice. I also have a big ol tub of lard I use for cooking to save time rendering
To render oils, place pot on low heat, add parts and occasionally stir. You may get bits stuck to the pan, do not worry, that is deliciousness waiting to be deglazed.

Step 1: Cooking curry paste [3-5 min]
NOTE: the curry paste already has some spice level to it, so the more you use, the more spicy it will become. If you cannot handle spice, you can always use a lower ratio of paste to coconut milk, I suggest 40g of curry paste or reach out and we can try to make our own paste together.
Warm fat or oil on low - medium heat, add your curry paste and cook until paste becomes fragrant. Break up any larger chunks, if still a bit chunky, add more oil. You will start to see the oil catching the color of the paste, that is also a good indicator for the next step.

Step 2: Combining paste and coconut cream [15-20 min]
Here is where your curry will make it or break it, literally. We want to add the coconut cream in small portions and cook the mixture down until the oil separates or breaks, then repeat. Most places just combine the paste and coconut cream and call it a curry, not in my house. This process takes the most patience, but it’s how we build rich full authentic flavors.
Don’t need to be precise, pour about 80-100 ml of coconut cream at a time, and cook until oil breaks.
Once oil breaks add another 80-100 ml coconut cream, and repeat process until your measured cream is done.
(Photo of oil breaking next photo)

Decision time: How will you eat your curry??
Contrary to popular belief, and what you may find in most restaurants, in Thailand curry is served with rice or noodles! Also it comes in different viscosities! Typically when eating with noodles, the curry is more watery, and when eating with rice, it tends to be thicker.
We need to add water later, so if you plan to eat with rice, add about 1/2 - 1 cups of water, if you plan to eat with noodles, add more than 1-2 cups or to your preference.
If you think you added to much water, no worries, just leave the pot to simmer for 15 minutes to reduce.
Remember, your coconut cream and curry paste should be in the final phase of broken oil before adding anything else, otherwise your curry will not have the deep color we want to achieve. Let’s move to the next step, time to add protein and any vegetables.

Step 3: Add protein and water [5-10 min]
In your broken oil paste cream combination, and add your protein, raise your heat to medium/high. Cook for about 5 minutes so that the curry flavor can develop into the protein. If the heat gets too hot, lower to medium and cook through.
Side Note: Chicken is the easiest to keep tender, however if you are using a different meat such as Pork, Beef or Lamb, your cook / simmer time should be longer so your meat becomes tender. Also, your cut and section of meat will determine the tenderness too.
Add your water, reduce your heat to medium, then simmer for another 5 to 10 minutes.

Step 4: Add your vegetables [2-3 min]
add your bamboo and let simmer for a bit.

Break: Remove unnecessary oil
If you used the rendered fat, or excess oil now would be the easiest time to remove it before adding aromatics.
Simmer until you start seeing the oil separate again. Move all the veggies and protein to one side of the pot, this allows the oil to accumulate on one side making it easier to extract. With a ladle or large spoon, scoop the top layer of oil out into a bowl, if using a large spoon be careful to avoid the hot pot as you are scooping.

Step 5: Add Aromatics - Fish Sauce and Kaffir Leaf
A good stoping point to do a taste test. Is it salty enough? If you have fish sauce, you can add some to enhance the aroma, otherwise good ol salt will do just fine. For reference, I found that if I added 1 cup of water, I would add 10mL of fish sauce, but of course we all have a different palates, so add according to your taste.
Add your Kaffir and stir into the curry.

Step 6: Add Aromatics - Thai Basil and Fresh Thai Chili Pepper
Remember the curry paste already has a spice to it, however the fresh Thai chilis are not only to increase the Scoville level, but it really enhances the aroma and adds another dimension to the dish. If you want to try, but don’t want too spicy, I suggest removing the stem, halve the peppers and remove the seeds, only using the flesh. DO NOT FORGET to wash your hands with soap to get all the oils from the pepper off your fingers. Avoid touching eyes after touching peppers! You can also try a less spicy pepper such as serrano.
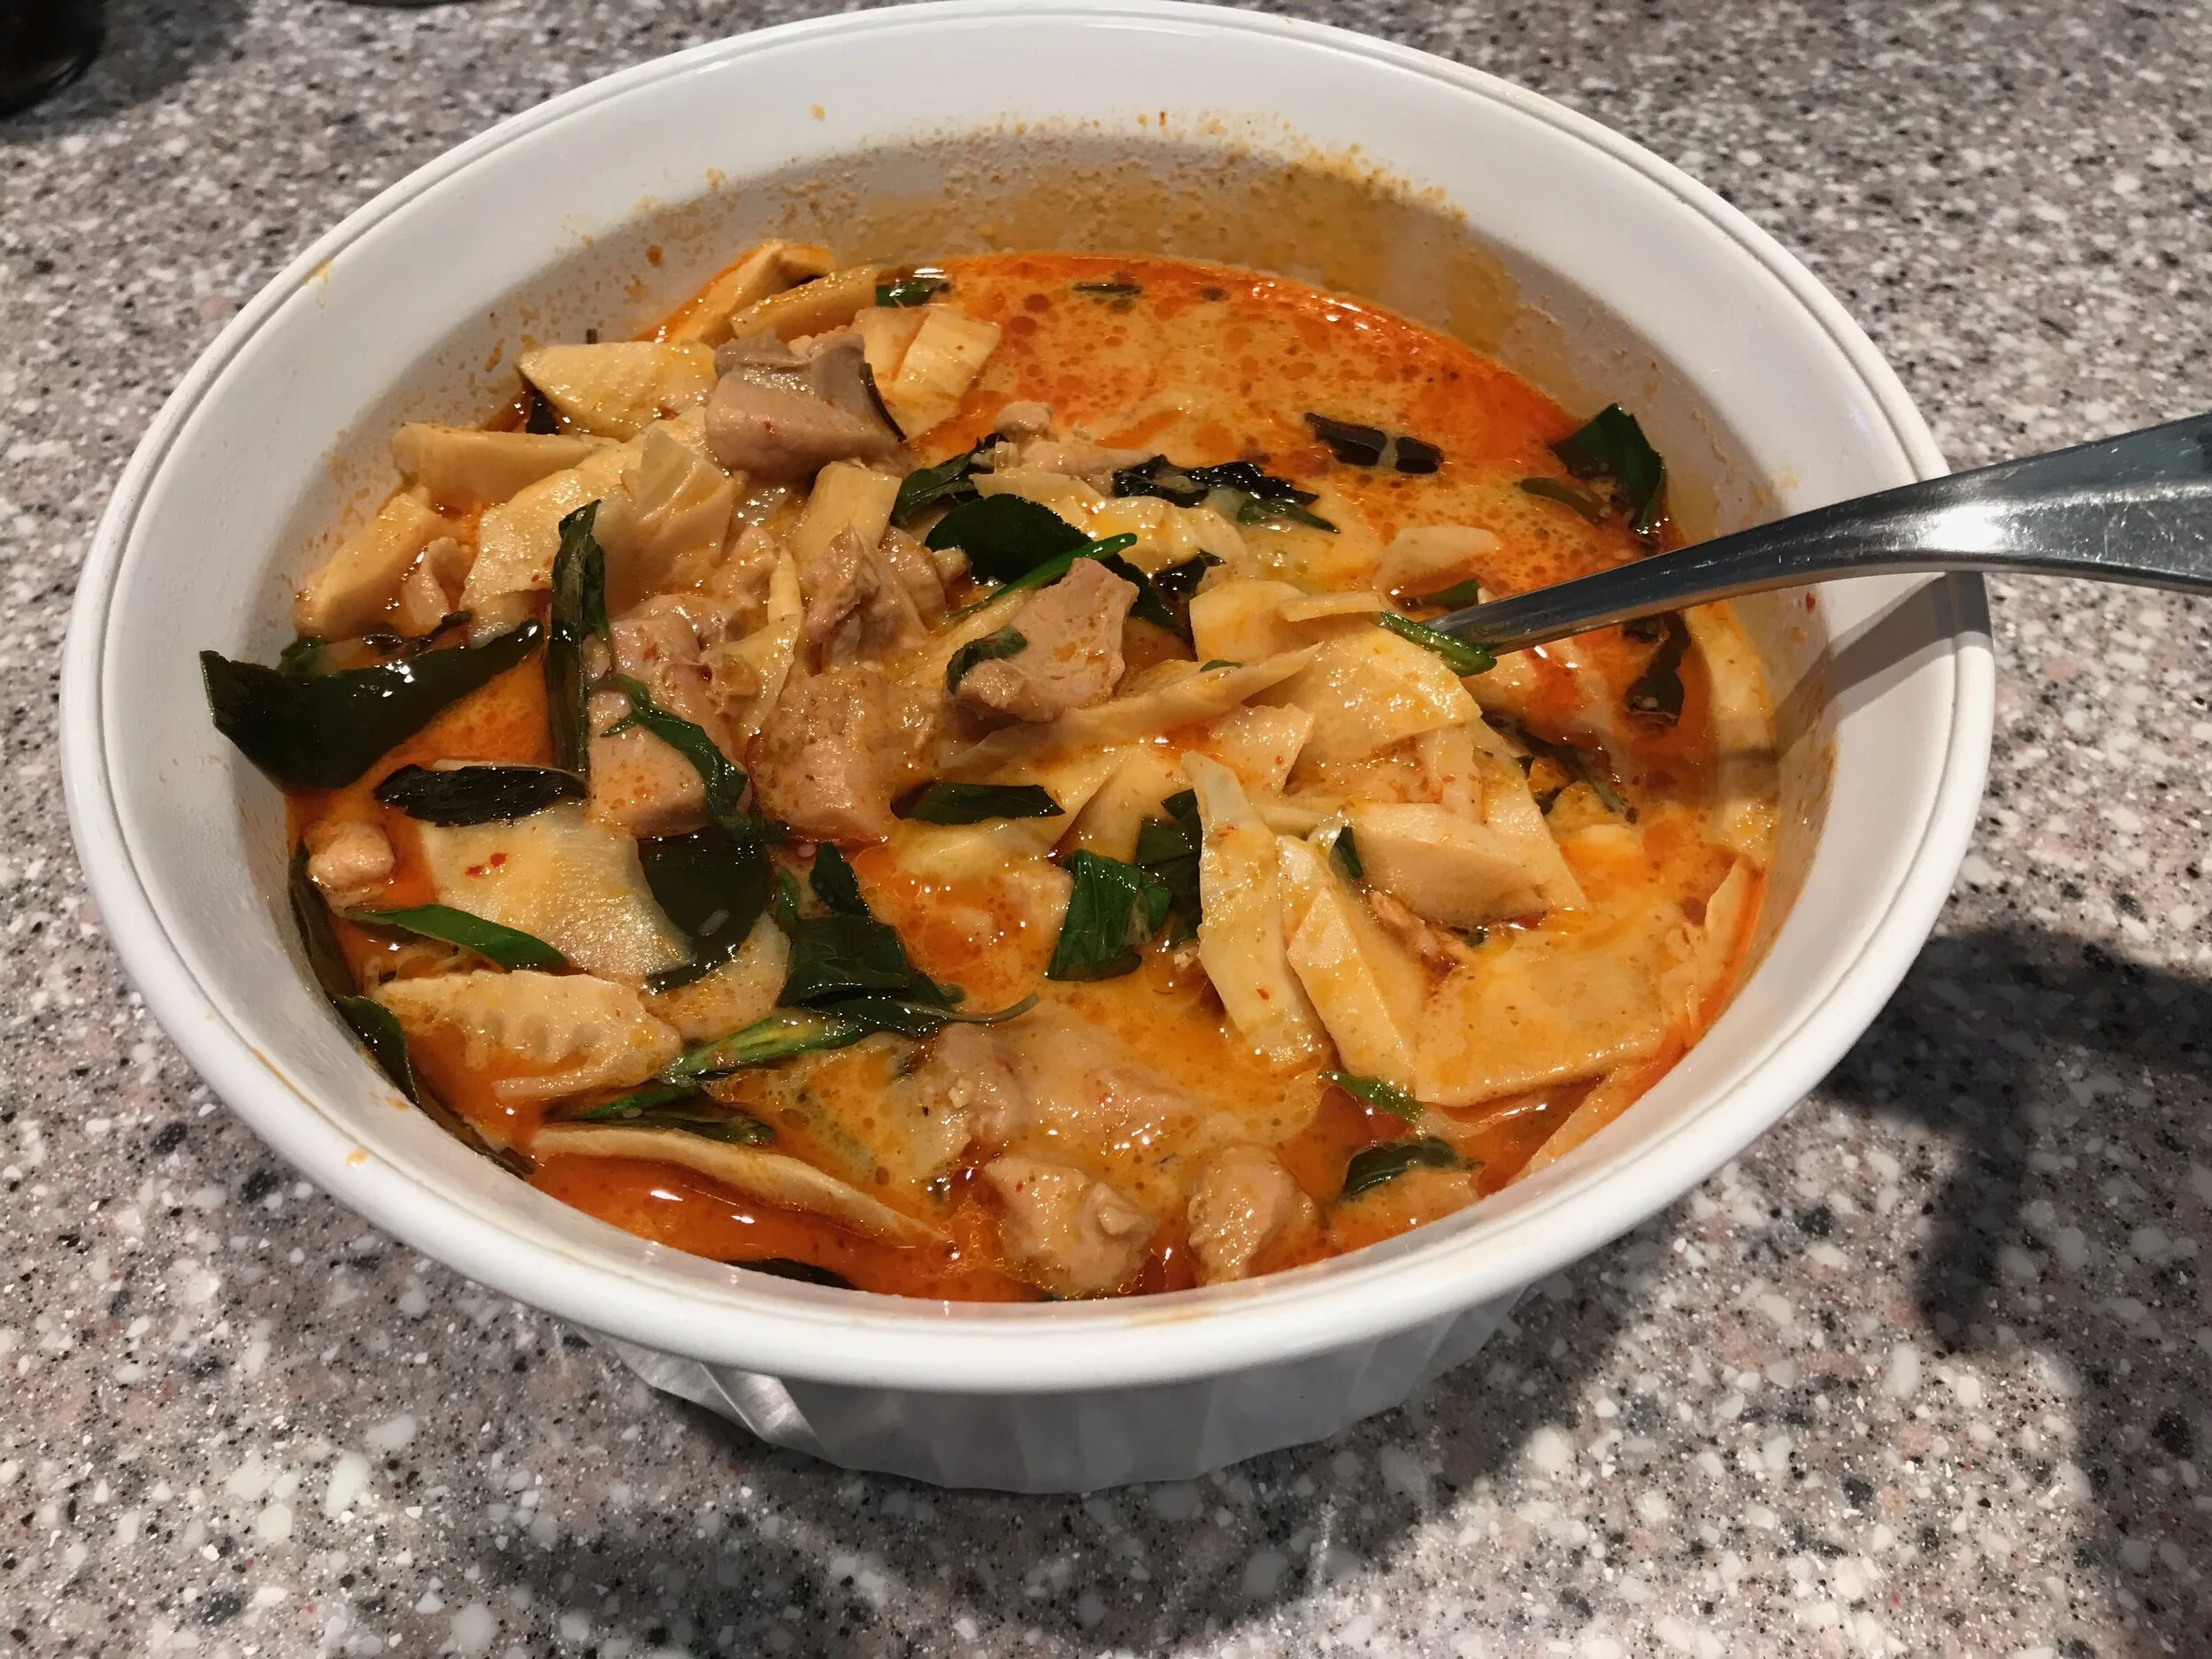
….and thats it! Your Red Curry dish is complete.
Congrats! Your Red Curry is ready to serve! Please enjoy.
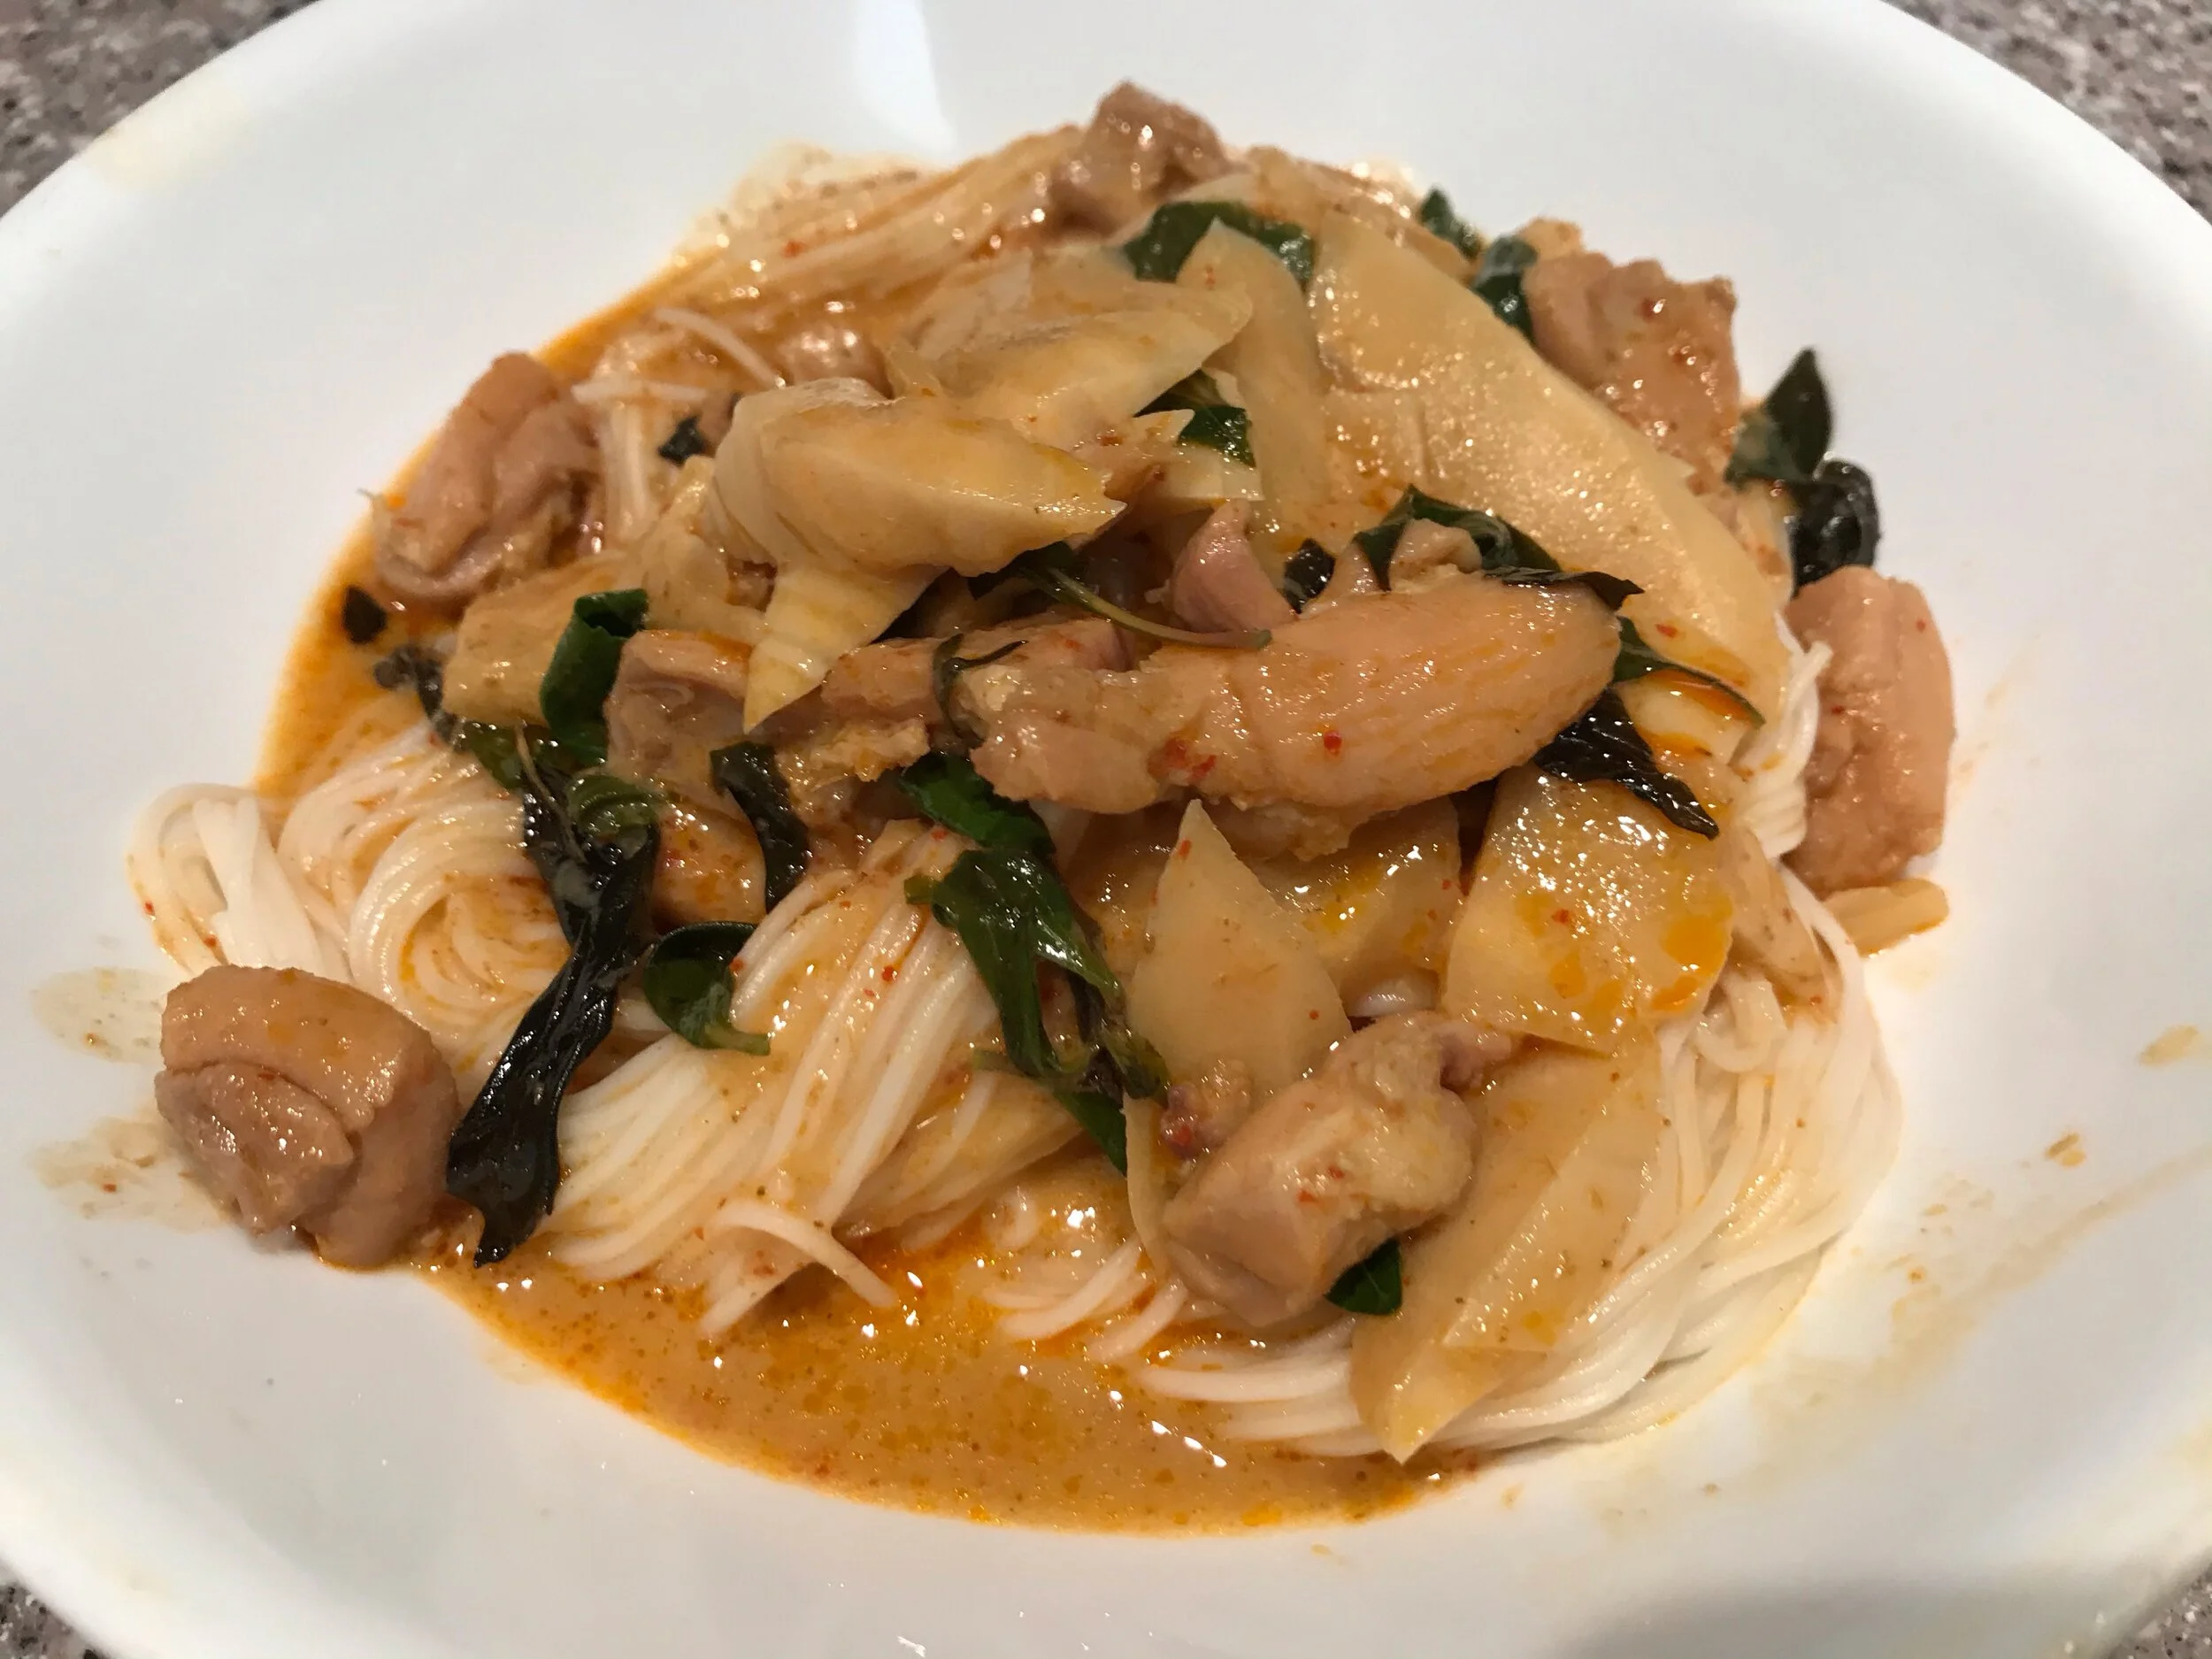
Below is a photo of curry and noodles. Typically you will find thin Rice Noodle for this curry, but at my house we enjoy with Japanese style Soba for the texture.
Please take the time to fill out a quick survey: